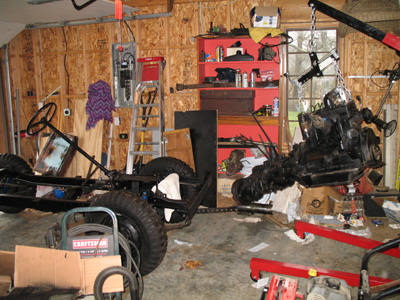
| Suddenly there is real progress!
No matter how hard we try, we can only manage to snatch an hour here and there to work on the jeep. But those hours are starting to add up!
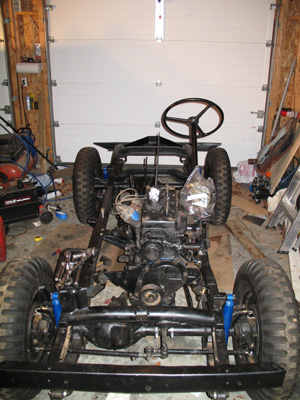
That’s cool
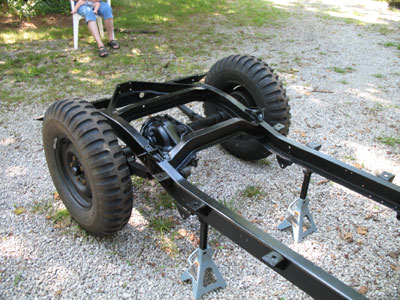
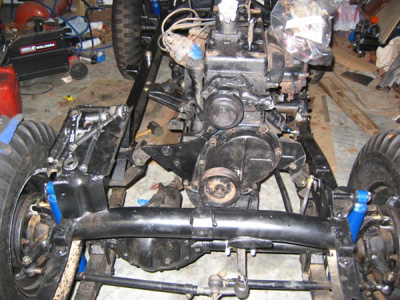
With the drive train in place, we really wanted to test fire the engine. That meant getting the “fluid” management systems in place – fuel, coolant and oil had to move. When we purchased the engine from Harry Sheets a couple of years ago, he had been able to supply us with the proper 3a “side mount” radiator. We had taken it to a local radiator shop for a rehab job. It turned out that all that was needed was a good cleaning and some paint to make it look like new. Replacing the radiator cap really made it look shiny.
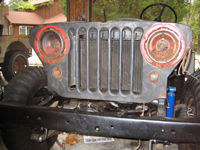
Grill work
That renewed radiator needed a special home - Ole Blue’s grill has some issues. So Barry figured a replacement found on e-Bay was the answer. Even though advertised as a 3a grill, upon arrival, it turned out to be a 2a grill. Given Ole Yeller's current state, a grill transplant may happen later. For now, a quick weld job to repair a rusted lower mount of the original grill bracket will have to do. It isn’t pretty, but it is the correct grill and has the mounting hardware for the radiator.
If it moves, replace it.
With no idea of how long the engine had been setting, we decided that we would replace all the external parts. Hoses, points, plugs, wiring, distributor cap and rotor, were ordered and installed. The engine had no fuel pump, so a new one was installed. We ordered all new fuel lines (tank to carburetor) and a new oil pressure gauge and lines.
We installed the starter and generator (although we didn’t hook it up). We purchased a new key switch (foregoing the original foot starter option) and did the basic wiring. We did a test “spin” of the starter. A twist of the key and parts moved!
Fuel of ideas
One of the exciting “features” of early Willys Jeeps is the fuel tank under the driver’s seat. With the tub still on the floor, some rigging was in order to get fuel to the engine. Barry had been pondering modifying a lawn mower tank as a temporary solution. Luckily, we had made a visit to Harry for more parts. We had asked Harry for some ideas. He said the easiest solution is to stick a hose in a regular gas can. Good idea.
We obtained a 3 foot length of rubber fuel line, along with a barbed fitting that screwed into the inlet of the fuel pump form the local Auto Zone store.
There comes a time…
Suddenly we were ready to test fire. Everything was double checked. We cleared the area of tools, stuck the gas hose down the spout of a gas can – and moved a fire extinguisher within quick reach.
Evan would work the choke and throttle. Barry would turn the key. First crank. Evan reports fuel moving into the fuel bowl. Second crank, slight drip of gas at the carburetor. Test halted for a quick tightening. Third crank – it fires! And dies. Evan makes minor adjustments to the throttle. Fourth crank – it starts and continues running!
A champagne moment
Evan and Barry stood there listening, in a state of shock. Paula, who had been watching yelled “This calls for champagne!” Barry switched the engine off and Evan started a quick inspection while Paula retrieved the champagne and glasses (always need a bottle in the fridge just in case something needs toasting). There were minor leaks in the oil gauge line and around the fuel pump. A couple of wrench turns and both were fixed.
We noticed a little coolant seep from the front of the head. We had taken the four corner head bolts out and bolted on the engine leveler. We had also forgotten to torque them down after we had installed the engine in the frame. A quick application of the torque wrench and we are ready to fire again.
But first we raised our glasses in a toast to that old engine.
Sounds like a winner
Without touching the chock or throttle, Barry hit the starter again. This time, the engine started with only a second or two of cranking and settled into an idle. Evan had stuck the exhaust system in place before our first test. It sounds wonderful. Good oil pressure and no smoke of any color. More grins and more champagne!
Are enthusiasm was only slightly damped by a few drips of oil coming from under the crank pulley. We appeared to have made a rookie error in installing the new seal when we replaced the mounting plate. We will replace it again, when we have the grill removed for restoration and painting.
Suddenly it seems possible…
The new body has been sitting in the middle of floor since we purchased it last spring. With the test firing such a success we are ready to do a test fitting. We are also planning for all the additional items we want to install before we mount the body after painting. That includes rerouting the exhaust (required by the Newgren lift), installing the PTO and moving the Newgren lift from the 2a to its new home.
Stay tuned!
Barry’s notes: This was a special moment. I’m only sorry the dads had been here to hear it fire. They would have been proud.
Evan’s notes: Simply amazing. I’m not surprised it started, just that it started so easily. Harry sold us a great engine.
|


