
1949 Willys Jeep CJ-3A:
Project "Ole Blue"
Part 12 - A Rebolting Development
Project "Ole Blue"
Part 12 - A Rebolting Development


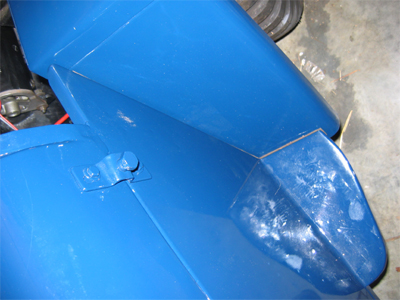
When we did the test fit of the body, we had wisely bagged and marked the rubber mounts for each bolt hole as we removed the tub for painting. We had also ordered “anti-squeak” welt for mounting the fenders and the gas tank. So the mounting process was pretty straight forward, until we got to the bolts in the bed.
Step bolts, the “correct” bolts for the mounting holes in the bed area, are similar to carriage bolts (round head, square shoulder), but the head is flatter. The idea, we assume, is to allow cargo to slide easily inside the bed of the jeep. Barry had purchased a set of “correct size” step bolts off of e-bay, but they were too short (by a ¼ inch) for our body/frame combination. We had conducted the test fit with standard bolts. Unfortunately, Farm Jeep’s nearest town no longer has a real hardware store. The large box stores were no help. Luckily, Barry’s day-job is located in Bloomington, home of Kleindorfer’s Hardware.
Kleindorfer’s is one of those, sadly, few remaining real hardware stores with several knowledgeable staff, who provide real service. Barry took the too-short step bolt in and handed it to the guy who met him at the front door. He said “I need a couple of these, only longer” and away they went into the back storage room. The whole transaction from the time Barry walked in the door until he walked out with the correct length step bolts took less than 5 minutes.
The step bolt hunt led us to an obvious Farm Jeep improvement. We replaced the standard hex head bolts in the foot wells with elevator bolts (think step bolts with a flat head). If Willys were still around, we would suggest that engineering change.
Engauging work
Ole Blue came with a complete set of rusty gauges. To expedite the process, we choose to purchase reproduction gauges, with the idea that we would keep the old gauges for a possible rebuilding project in the future. (Editor’s note: Is it possible to use the term “expedite” in regards to a project that has taken six years?) With the body firmly bolted to the frame, Evan began the task of installing gauges in the dash.
The fit was tight enough to require removal of the paint along the edge of the hole for a couple of the gauges. We also wanted to do this part of the installation before we reinstalled the gas tanks and seats, to give easier access to behind the dash.
Wire where we?
An early Ole Blue Christmas present had been a complete wiring harness from Walck’s. When Barry opened the box to start the re-wiring process, he discovered a 2004 calendar! He also discovered that a FJM (Farm Jeep mouse) had chewed some of the cloth wire covers. Nothing that a little black tape couldn’t repair.
The Walck’s wiring harness was a breeze to install. Color coded wires and great documentation made an otherwise daunting task fun.
Next up
A new family member!
Barry’s notes: I enjoyed the wiring and would highly recommend this for anyone restoring a Willys.
Evan’s notes: