|
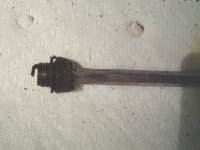
Plug removal tool
(cold chisel hammered through a broken plug)
|
|
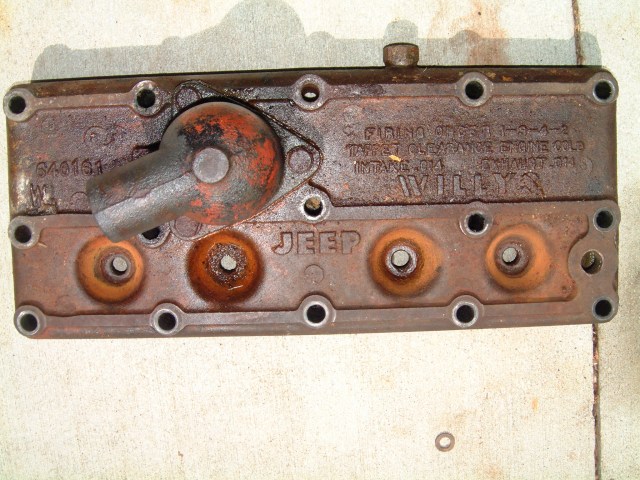
 Head without plugs
|
|
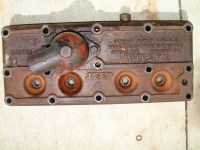
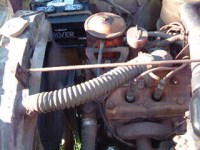
 Carbon build-up on the bottom of the head
|
|
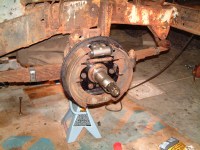 Front passenger side brake
|
|
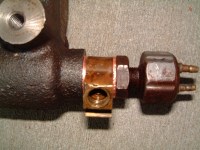 Copper washers on brake MC
|
|
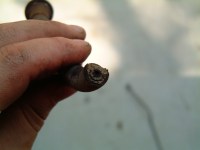 Completely blocked front brake line
|
|
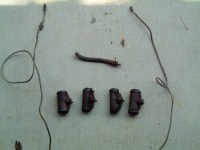 Brake lines that appear to have been wrapped around a beer can
|
|
 Back together
|
|
 Engine starting (movie)
|
|
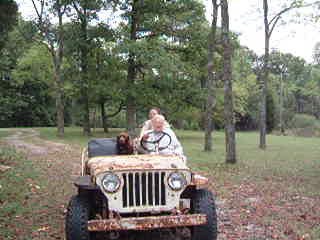
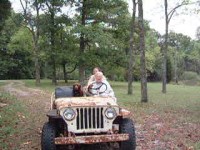 PD in the drivers seat with co-pilot Bruin in the front seat and Paula hanging on in back
|
|
|
Heads Up (and off)
After a week of PB Blaster soaking, Barry gave the number 3 plug a gentle twist. It kept right on going and looked just like the number 2. Evan had purchased a new Easy Out tool, so we gave it a try. Neither plug would budge and we determined the head would have to come off.
One of the joys of working on the Willys is that everything is pretty simple. Lots of room to work and not lots of things bolted to engine. Getting the head off looked pretty easy and it actually turned out to be pretty straight forward. We drained the radiator, removed the radiator support rod and the top radiator hose.
While he was undoing the plumbing, Evan removed the old Chevy heater from under the dash. The heater hoses had been routed in such as way as to prevent the air cleaner from being located in its proper place on the firewall. Real Jeeps dont have heaters not old Chevy heaters anyway.
Next, Evan attacked the head bolts with an impact wrench. The couple of weeks spent soaking in PB Blaster paid off and the nuts came off without any problems. Once everything was unbolted, we were able to insert a thin screwdriver blade between the head and engine block. Not wanting to damage the head or block surface, we took several minutes of gentle persuasion to break the gasket seal. Once the head was free all around, the two of us were able to lift the head up and off.
A Bad Head Ache
With the head off, we began our plan of attack. It was easy to see that the plugs had become a part of the head. We were determined not to damage the head if at all possible, but it was clear that it was going to some real force to break the rust bond between the plugs and the head. We tried a couple of different approaches, including using a chisel to bend the plug toward the middle of the hole. Nothing seemed to be working.
Evan came up with the idea of driving a small chisel into the plug body and using a wrench to turn the chisel (and the plug). With Evan standing on top of the head to prevent it from moving, Barry tried turning the chisel with an adjustable wrench. Nothing moved.
With a little Brown County engineering (a term of endearment akin to Rube Goldberg) we ground the chisel down so that a closed-end wrench would fit it. We drove the chisel into the plug and slipped the wrench (a Craftsman) over the chisel and slipped a 3 foot cheater bar over the wrench. With Evan standing on the head and Barry on the end of the cheater bar the grunting got serious.
While applying steady but increasing pressure, Ev spied movement. More PB Blaster and slow movements back and forth. Once it was evident that we were making progress, we took our time working the plug out. It did finally come out and much to our relief, the plug base was intact and the threads didnt appear to be damaged. After a brief celebration (including a visit to the garage beer frig) we attacked the second plug with the same approach. This time Barry stood on the head and Evan manned the cheater bar, but the results were the same. After another 30 minutes, the second plug was out and there was much joy in the Willys garage!
The head was inspected by the chief mechanics and pronounced in excellent shape. They did recommend cleaning the plug threads by running an old plug in and out several times, while applying PB Blaster. We also took the time to carefully clean off the old gasket and to remove as much carbon as we could from the head and engine block. Before we could put the head back on, we needed to acquire a new head gasket.
Brake Down
While Evan had worked on removing the head, Barry returned to the brake problems. As described in Part three, the Jeep appears to have had one operational brake (passenger rear) for some time. All of the wheel cylinders appeared to be leaking and would need to be replaced. The metal brake lines appear to have been replaced at some distant point. The PO apparently purchased standard length brake lines and wrapped them around a beer can to shorten them to proper length. The rubber hoses (there are four) looked original and had to be replaced. Luckily, new wheel cylinders and hoses are available, so those were ordered.
Three of the four brake drums were in good shape (they havent been used!). The passenger front was grooved. The reason became clear when Barry was removing the front brake lines. The PO has routed the brake on top of the axle/spring clamp. At some point, the PO had smashed the axle against the frame (visions of an airborne Jeep!) and had flattened the line, most likely while the there was a foot on the brake pedal. The result was that the front brake was locked against the drum until the shoe wore away. The brake experts at a local brake shop just scratched their heads when Barry took the drum in to be turned. There best advice was to clean it up with some sandpaper and put it back on.
While we ordered the rubber hoses, we decided to build our own lines. Another tool purchase opportunity! Off to Sears to purchase a double flare tool and a small tubing bender. These ran the Restoration Costometer up a mere $25. Barry managed to break the flaring tube body, but Chief Mechanic Forrest supplied a replacement. The entire brake lines were replaced, with the exception of two small S located on at the front wheels. These were taken off and thoroughly cleaned.
Work stopped for parts. More importantly, we had to go on a backpacking trip in the mountains of Colorado. So the Jeep would have to wait a couple of weeks.
Meanwhile, Back at the Wrench
Back from the mountains, we started on a Saturday morning with the goal of having the Jeep running AND stopping by afternoon. Barry had been able to get the wheel cylinders and brake shoes replaced, along with attaching all the new brake lines. Time for a test.
Evan supplied the foot power, stepping on the pedal, while Barry watched for leaks. There were plenty! Most of the leaks were quickly fixed by simply tightening the connection. A leak at the master cylinder presented more of a challenge. Copper washers are used between the master cylinder and the brake line connector. We had tried to reuse the old washers when we replaced the master cylinder, but they leaked. We were able to find similar, but not exact washers at NAPA and had filed and cut them to fit. It took several tries with Evan and Barry taking turns trying to tighten the fitting.
Final the leaks were stopped and the moment of truth arrived. With Evan at the pedal, Barry spun each wheel and called for Evan to hit the brakes. And all the brakes worked! Time for another celebration and a trip to the beer frig.
The next step was to get the head back in place. Following the chief mechanics instructions, we applied a small amount of grease to the edges of the new head gasket and slipped it on the head. The two of us lifted the head in place and Evan was left to put everything back together.
What!? No Parts Left?
Evan started the reassembly while Barry remounted the wheels and took the Jeep off the jack stands. The Jeep was quickly back on the ground. Evan took his time and torqued the head according to the bolt sequence in the service manual. Evan had wisely marked the plug wires and the engine was quickly reassembled. Hoses were reattached and new antifreeze added to the radiator.
The moment of truth. No parts were left over and the time had come to turn the key. Barry did the honors and... nothing. The battery had died and wouldnt turn the engine. The Jeep was pushed outside and we used the Cherokee to jump start the engine. After a few cranks, the engine started and sounded great!
Evan took the wheel and the Jeep was alive again!
Next, a new battery, a new exhaust system and some adjustments to the PTO!
Barry's notes:
I think this Jeep has had a rough life. The left front axle has been replaced (it doesn't match the other side) and the tow hooks attached to the front bumper have been bent. But the engine seems strong and the Jeep seems to have taken the abuse and seems ready for a new life. It sure is fun to drive.
Evan's notes:
While the brakes arent quite up to todays standards, I was pleased with their performance. Barry thinks we can adjust and re-bleed the brakes and improve the stopping ability even more, but for now just being able to stop is a BIG improvement.
|
|